Major Project – Development 02

Introduction: In this blog post I will start implementing the core mechanics that will make up the player and enemy interactions, this will include the player movement, player wall bouncing, enemy movement and enemy attack. These functions are key to the base mechanics of the game; can the player complete obstacles in the levels and can the enemy detect the player and kill.

The first step was to create the player movement which I used from one of my previous projects in the second year from my zombie survival games. However I did modify this

Script

Player Movement –

Player Movement

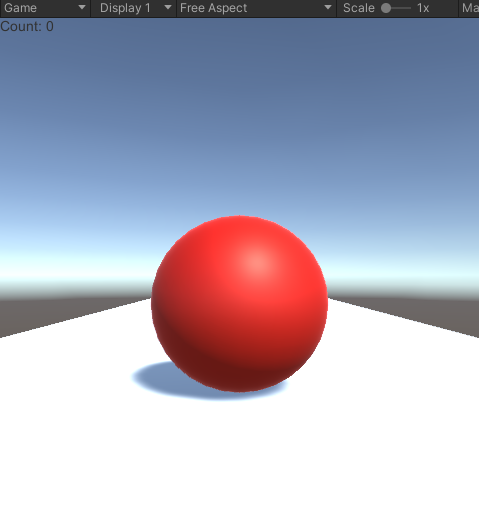
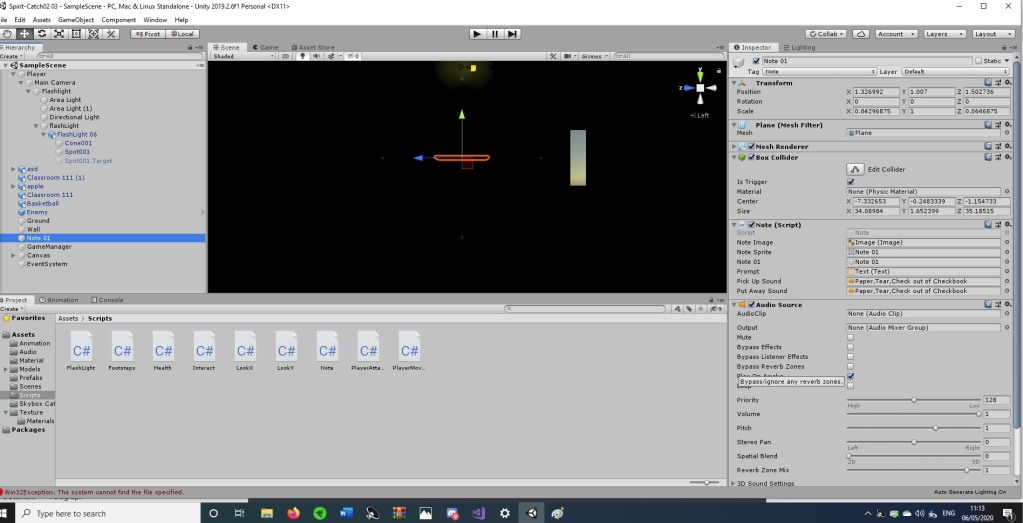
The player movement is controlled by the default controls for unity, using WASD to move round in the scene and then the mouse to look round using another script attached to the player and main camera (“Look X” + “Look Y”). Using the unity input i got the axis of “horizontal” and “vertical” to control the camera (this was taken from my zombie shooter game). However I changed the original script to use direction to update the player when moving forward through length measurement using magnitude, it takes the coordinates of the x and y from the players input and then calculates the target angle from the way they would be moving. Takes the rotation of the quaternion and converts the target angle through a eluer to convert the angle when the player moves.

A have a few issues with it, when the player moves forward there is a slight drift to the right or left but I am not too sure how to fix it, however it does work it is just not as slick as I would like. This can be a later fix when I have completed every thing else, its just a minor perfection I would like to make.

Jump

Then implemented a jump function which checks the player is grounded using an if statement and then applies jump speed, the jump is equal to gravity multiplied by time dot delta time. The else statement simply is just the walking function.

I noticed that the movement of the player is not very fluid and has some input issue where the player moves diagonal when the player presses forward. This is an issue that needs to be fixed so the core mechanics work.
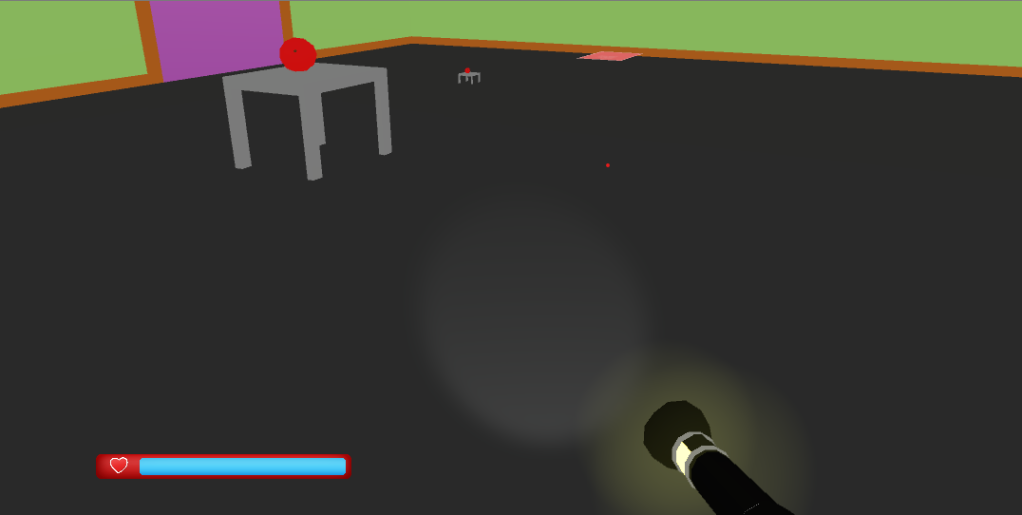
Wall bounce

The wall bounce mechanic from the tutorial that I was following was suppose to send the player in the opposite direction, it works but does not work as intended. This is not a massive issue but I am going to try resolve this by following the tutorial earlier to try fix it. However the raycast is being recognised when the player touches the wall to bounce of it. However the player can then just keep bouncing off the same wall to scale an obstacle which does affect the effectiveness of the mechanic. I am going to follow the tutorial again and see where my code differs in an attempt to get it to work as intended, its not a major issue but I feel like this affects the gameplay.

New Player Movement (script)-

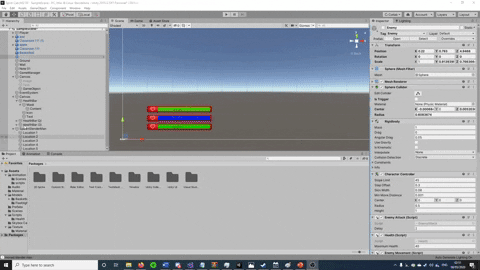
So I changed what I did with the getAxis to GetAxisRaw because smoothing is applied to getAxis. This smooths the direction over time where as the GetAxisRaw does not apply the smoothing and inputs it automatically without smoothing over time (time.deltatime) by directly using the magnitude that has been applied in the script. This seemed to fix some of the issues that I was having with the movement going diagonal slightly after inputting a direction.

Instead of trying to use direction and prevDirection to get the last move equal to the current move I followed his script and made a vertical velocity that uses the jump force instead of jump speed to multiply the vertical velocity for the wall bounce to happen when the raycast detects the wall. Trying to kit bash one of my older movement scripts to the tutorial was what was causing the function to not perform correctly so after using his way of using move Vector and breaking down the jump force, gravity, vertical velocity, speed and last move made it much simpler to get the function work. So it was mainly two lines of code which was placed wrongly and was making the wall bounce not register properly, now that it has been reformed the code seems to work properly for the intended purpose. Also the raycast now is only being detected once now when the player wall bounces instead of multiple raycasts hitting the wall like before.

Reformed Movement and Wall bounce:

(14) Creating a Third Person Camera using Cinemachine Free Look in Unity that Avoids Obstacles (Tutorial) – YouTube

Cinemachine added instead
reasons:

  • Reduces the clipping from the camera from going outside the walls
  • Ease of use and simplicity
  • Smooth a fluid rotation of the camera
  • Very customisable

Focus on the next blog post:
– Setting up two types of enemies that will be in the game (1 ground enemy and 1 flying enemy)

Many Thanks,

James Lacey

Dealing with data!

Serialisation and storage of data

JSON!

What is JSON?

Known as JavaScript Object Notation, is a represented format for data. As one of the most understood and common mediums for exchanging text based data, this links server-side and front-end development, systems, middleware and databases (Freeman, 2019). JSON was developed to communicate between JavaScript clients and backend servers. It was made possible as a medium to be able to develop and communicate between both front-end and Server-side for useful iterations on projects.

What reference material did I use?

Given by our tutor Simon Hunt, he gave us a demonstration on a project that he had worked on that was a quiz game. He used Json by saving the questions/leaderboard data into in string format file on drop box that is referenced using a link to convert the data into his project through a script “DreamLoSubmit”, “TestJSONRequest”, “Questions” and “TestWebRequest”. I am going to use the idea of these scripts that his used to implement something similar in my own iteration/idea. Some of the code I have directly used from the example given. The example project is in the same project that I have created on for reference to what was shown to me before.

What is going to happen in my demo:

In my scene I want to create a simple game where the player moves across some tiles without falling off collecting collectibles to beat the level. I am going to use JSON by saving the position of the tiles to spawn when the game is loaded. So in theory, this should be less intensive on the system memory because the tiles are not taking up space in the scene and are being saved externally though the nPoint database. This makes the size of the game smaller because all the position of the tiles are not being saved in the game but in the JSON file instead. This can make the load time longer but the game in itself smaller in memory. However, the way I have used it makes it easier to develop levels quicker because not having to worry about the size of the base game gives me more room to expand on the levels. In turn, this should make it quicker and easier to develop more levels at a cost of not making the base game memory any bigger.

“JsonCreate”:

In this script I have created a function called JSON create that is going to create an array of the game object floor tiles with the tag floor tiles from the JSON file through the JSONdownload script. This is creating a copy of this template object saver and filling in this information of the Player, EndBlock transform positions in the scene. Next the array uses the vector 3 postions of the floortiles and converts from a game object to the game objects position. Then the json string at the bottom converts the all the information into a Json string and then prints it onto the console.

“JSONdownload”

Firstly, the JSON file used through npoint is being linked so the file can be downloaded through the “JSONdownload” script. Next I am referencing all of the game object positions that are needed such as player, floor tiles and end tile. Then in the start function I used a coroutine to get the string link through the Ienumerator couroutine request from the JSON file on npoint that uses for each loop to instantiate tiles.

“ObjectSaver”

This script is creating a public vector3 array that will be used to store the position of the floor tile objects and then I am also using this script to save the position of the player and end tile position. Essentially the script is being used a place to store the position and reference them in the other scripts.

Json File

The data being saved in the file is the array positions of the floor tiles and the end tile and player position.

Scene

Here you can see in this screenshot that the floor tiles are not loaded in the scene. When the scene is loaded the JSONdownload will request JSON text and will be converted through the scene.

Game Start scene

After the scene starts thanks to the coroutine in the start function of JSONcreate script, the floor tiles are positions are loaded from the JSON file on npoint.

Video of project:
https://youtu.be/R2e38h5YaBc

Limitations –

Small file size to save text with dropbox, String can be quite intensive on the system to convert. Instead I am going to use nPoint that has a higher memory allocation to to save my tile blocks.

JSON is great for converting/sending small amounts of data but struggles with larger amount of information. JSON can only be used to store a number, string, boolean, object and array which limits its ability of using multiple data types. However this is useful for quick and messy projects and new developers (Avato, n.d.) but no so much for complex problems or converting multiple different things for different systems.

Many Thanks,

James Lacey

Published: 16/01/2023

Freeman, J. (2019). What is JSON? A better format for data exchange. [online] InfoWorld. Available at: https://www.infoworld.com/article/3222851/what-is-json-a-better-format-for-data-exchange.html.

(Freeman, 2019)

Hutch. (n.d.). The hidden optimisation in network games. [online] Available at: https://www.hutch.io/blog/tech/the-hidden-optimisation-in-network-games-using-json/#:~:text=We%20use%20JSON%20data%20to [Accessed 16 Jan. 2023].

(Hutch, n.d.)

Avato. (n.d.). Pros and Cons of JSON vs HTML. [online] Available at: https://avato.co/developers/pros-cons-json-vs-xml/#:~:text=JSON%20isn [Accessed 16 Jan. 2023].

(Avato, n.d.)

Npoint.io. (2023). [online] Available at: https://www.npoint.io/ [Accessed 16 Jan. 2023].

Project file below:

Health Bar Part 1

Introduction – In this blog post I will be adding a health bar into my game, my tutor told me to follow this tutorial to cover some of the criteria for my assingment.

Sections
1) Health Bar tutorial

Health bar tutorial

I will be using InScope Studios youtube tutorials and I also paid for his health bar tutorial on pateron

Here is a link the patreon account that I brought his health bar tutorial packages https://www.patreon.com/posts/health-bar-4364337

Starting to implement

So what I’m going to do now is put the health bar into project folder and follow the tutorial setting up the health bar. Then from then on I can look at how I’m going to apply it to my player. Once I’ve added the health bar to the scene and get it too work then I can start properly implementing it in.

Now that I’ve added it I need to start adjust the mechanics of the bar, this is where I get stumped though. I need to use his code but make it my own.
how though. It worked in the example scene in the package but I’m having trouble getting it to work in my scene.

now the script has just broken for no reason? So I’m going to have to set the health bar up again

I’m confused because the code inside it has tests to see if the code is running like key w take 10 damage but it doesnt damage the script, it dont work. Even in the guys tutorial. I’m sure you can get it too work but its adding complex code into something, that still really confuses me.

How does the code work?

So what am I trying to solve here?
First of all I need to calm myself and think, this is a problem I need to solve. The health script I added in I deleted some of the code and only tried to set up the health bar ignoring the stamina bar. So what im going to do first of all is set up the values in the script properly and put this into the scene. Looking at the health bar scripts that I added in had small inconsistences in the code, fixing them now that I’m abit more confident at i’m going to try the original press onkeyenter press “W” function and see if it affects the health bar. It Didn’t affect it but my player moves forwared with the “w” key so im going to change the key to see if that affects the health bar. It didn’t so I decided to change the key being referenced to letter “R”.

This image has an empty alt attribute; its file name is image-12.png
This shows my health bars when I first put them into the scene so the code worked, deleting the lines of code like I did the first attempt breaks te
This shows the usage of the player script working with the health bar script
Animated GIF
Disabling the otehr stamina/energy bar and then testing the health bar by pressing the “R” key

Before breaking this down I have another game breaking bug, I saved and closed my project to work on the next day and now I am having this issue which I can’t seem to get past right now.
Everything in the console will not recognise any of my files and therefore the game will not run because none of the logic is being used. So I am going to look up the error that I am getting and see how to fix it.

https://forum.unity.com/threads/solved-the-referenced-script-on-this-behaviour-is-missing.381611/
This link talk about the same issues that I’m having and that it is a common error with unity and it means that the scene has somehow become corrupted.

https://forum.unity.com/threads/cant-add-script-component.632746/

Assembly reference point

How does the health bar work?
I still don’t truly understand what logic or how to add it in. Maybe this is because I still don’t understand the script.

The three main scripts
1) Player
2) BarScript
3) Stat

Player script –

What will be in the next part?
In conclusion –

Recreating Game Part 1

Introduction: My game broke when I was developing and I had not evidenced some of the work that I had already done, So In this I’m going to be going through the development of the game. This can be later used as evidence for when explaing my game video and how it works.

STEPS

  1. Firstly I’m going to create a new project and implement what I did in the other project into this one.
  2. I need to add the player into the scene and add the camera to the player so the camera is tracked by the player
  3. Now I’m going to add the base mechanics into the game for the player (Player movement)
  4. Now that this is set up and there is no errors I am going to add in my flashlight. Postion it in front of the player in the view of the camera so it looks like it is being held.
  5. Added sphere colliders, flashlight script and flashlight attack script. Now that is working, I’m going to add in my enemy.
  6. Ive added in the enemy and now the enemy will shrink as their health is delepleted and will die.
  7. Now I’m going to do my players health bar, Import my players health bar.
  8. The player health bar that works but not aswell before, the displayed is affected so seen as I dont have time I’m just going to move on.

Enemy Attack, Enemy Movement

Introduction – In this post I will be showing how I am going to create and implement enemy attack and enemy movement into my scene.

Enemy movement –
Firstly I’m going to use the 3D learning booklet handed to me at the start of the year created by my tutors. Inside it has some code on getting the enemy to use tags to follow the player position.

So I’m going to copy and reuse the code in my “EnemyMovement” Script and place that on my enemy game object. The code identfies the

So it’s messing up my look Y script for some reason?
Looking close at the script, it is wrong, There is slight grammer issues that is breaking the game.

So I fixed the compile errors but the enemy still does move towards the player. So I am going to debug to see if the script is being run.

So the script is running but for some reason the code doesnt seem to be working. The script is trying to communicate with the character controller, so adding a character controller the enemy will follow the player now.

Seen as this isnt working
https://answers.unity.com/questions/938221/basic-enemy-ai-in-c.html

Enemy Attack –

Firstly I’m going to look at my player attack script and see how I have done that first. I’m going to reuse that code in my enemy attack script however I’m going to adjust it so it attacks the player.

Progress Check

Introduction – In this blog post I will be discussing how much time I have left for my project and how I am going to try achieve that.

Reason – I have been put in this position from uncomfortable living circumstances due to my student finance being recieved 5 months after I’m suppose to get it. This lead to a bunch of problems, physically and mentally approaching this project.

How long I got left?
This due in at 12 o’clock nigthtime tomorrow (5th), so I’m going to try my best to cover as much as possible in that time.

What needs to be done?
Upload my files to Git Hub
Class diagram
Blog Posts filling in the required checklist for OOP
1 game built
Testing table
5 minute video describing my project designs and the challanges faced

What have I done?
Game Scene
– Player movement
– Switch statement (footsteps)
– Loop and if statement (flashlight)
– Enemy Health
Done but not documented?
– Note

What features I need to make?
Wave system – Wave of enemies
https://www.youtube.com/watch?v=gbFBWxtpgpQ&t=921s
Player Health – 100 health, player can be hit by it
Enemy Attack – Enemy can damage the player
Slender man – slenderman spawn round the player and if the player
Enemy Movement – enemy moves to the players position


Help (unity waves project)- https://connect-prd-cdn.unity.com/20190702/5875671c-1a2c-48ea-915b-8daad33f4732_Lesson_Plan_4.4___For_Loops_For_Waves.pdf


UI –

Going to create these as seperate scenes and switch inbetween them

Main menu,
Pause menu,
Win/Lose Game Menu
Gro-outpost code (Game Manager)
https://github.com/Twilit/GroOutpost/tree/master/Gro-Outpost

I had a talk with my tutor and this is what he has proposed for me to have completed by the our next meeting tomorrow.

What I need to complete:

Core mechanics of the game ready
Slenderman AI script
– I need to add a way to die
– Also need to add a way to beat the game?
– Kill 30 enemies without dying.
– Health Script using the tutorial he has given me which will cover alot of brief

What the slenderman covering?
Class decleration and instantion
Use of constructors
Method Overloading
Testing a class
Use of Inheritance
Using public, private and protected methods (Private and protected methods)
Passing objects in functions (Passing values, passing objects)
Customs Name spaces

Health Script –
Use of constructors
Constructor overloading (Might have it)
Getter and setter
Use of inheritance
Custom name spaces

Done
loops
if and switch statements

What will be done tomorrow?
Use of polymorphism
Use of enumerators
Use of this and static keywords

Switch Statements / Lucid Dream

Introduction – In this blog post I will be demonstating how I have used Switch statements in my unity scene. I have used my footstep script to demonstrate I can use switch statements.

What did I do first?
I used a if and else statement at first using boolean to play the audio but I realised I could do the same script in a different way using switch statements.

What is the purpose of this script?
This script is place to create footstep sounds for the player when he is moving

What does the script do?
This script switches between two differnet audio clips using the character controller though boolean. The character controller is attached to my player in the scene. What the script is doing is checking if the player is grounded and if they are moving, if they are moving it will play the footsteps and they are not it wont play the audio.

Why did I do this?
I did this because I had already used an if/ else statement and I wanted to demonstate being able to use switch statement

Changing Game Idea/ Game Proposal

LAC13344231
James Lacey
Game Design

Changing Game Idea/ Game Proposal

Introduction: In this document I will discuss changing my idea and creating a new game proposal.

Sections 

  1. Why am I changing my idea?
  2. Base idea of game
  3. Inspirations
    – Slenderman
    – Resident evil 2
    – Gears of war horde mode
  4. Game Proposal

Why am I changing my Idea?

I want to change my Idea because I am personally finding it difficult to come up with ideas to create suspense and show my programming ability. Creating anticipation and tension is done by multiple things, sound, ui, camera changes, lighting, animations and level design. I liked my idea before but I was struggling to find assets that could be used for the idea. 

Base Idea of game:
3D Game
Three waves
Kill designated number of enemies to pass each wave, evade indestructible boss enemy
Pick up items to slow boss enemy 
Horror style first person shooter
Survival

Inspirations –

Slenderman – Slenderman is a simple take on the horror genre, find all the pages and escape slenderman. Slenderman will randomly generate close to your position, each page will increase the refresh frequency and speed of slenderman. When note 3 is collected an eerie slow drum beat sounds and slenderman chases you more aggressively. Tv buzzing noises will play when closed or slenderman in vision, if you are too close or look at slender he will kill you.

Best Features of game design in game:

  1. Enemy combat – One of the greatest assets of slenderman is the combat, the idea of having an enemy that you need to run from but can’t look at is the perfect enemy because he can sneak up on you. Slenderman adds that element that the player cannot just stand still or hide for fluid gameplay.
  2. Level Design – Escaping slenderman, to defeat the game you need to use the trees to block slendermans vision from him getting to you but it also makes it easy to get lost and go in circles when you get chased. This is good because it makes navigating and finding the pages hard. Pages are located around the map some outside and some in building, these building seen in 1.0 have tight hallways and use common scary places (e.g bathroom, long tunnels)
  3. Sound Design – The creepy and eerie crunching of grass and the unexpected loud radio signal sounds when you slenderman is near. The deep breaths of the player also adds to the immersion.
  4. Lighting – The dark makes it harder to navigate with only the use of a flashlight, so when you hear slenderman and not see him it adds that element of fear to the player not knowing where he is. 

Bad features of game design?

  1. Player Movement – The movement of the player is really slow and clucky, I would personally change it so the player could move faster because however moving slow may be scary it’s also annoying. I think this has more chance of deterring the player from playing again than it being fun.

Creative Influence 
I am going to use slenderman as a heavy influence and the functions that it has in them and try to replicate in my own version. As Identified in the inspirations, to make this possible I am going to have to focus on the Enemy AI, lighting, level design and sound design.

Slenderman evidence

1.1 (Bathroom building)

1.2 (Tunnels)

1.3 (Youtube video eight page slenderman playthrough)

Resident Evil 2 – This game includes multiple different features that helped me when thinking of making the game more fun. Mr X is a great example of this, aside from the base enemies which you can kill, Mr X is indestructible and the player has to run away from him. Both enemies alone are easy to get round but together they push the player to think tactically where they go to complete the level. 

Gears of War Horde Mode: 

Horde mode is a wave based survival where one player or a team has to survive 50 waves of enemies. Various power ups and different weapon power ups are available to kill the enemies . The best aspect of the game mode is the pacing of enemies through the rounds and it’s a simple kill all the enemies and survive the rounds(It doesn’t make the game too complex).

Using the inspirations I want to make a wave based first person horror experience

Basic Functions – 

“Base Idea of game:
3D Game
Three waves
Kill designated number of enemies to pass each wave, evade indestructible boss enemy
Pick up items to slow boss enemy 
Horror style first person shooter
Survival”

Location of the game?
Gated section of the woods (A dream in the players head) 

Type of camera?
First Person 

Lighting?
Only lighting will be a flashlight

What areas am I going to include?
I want to include some building like slender man did to add to the gameplay

Classroom
Hospital Cubicle
Bathroom/toilet
Living Room
Bridge
Stable 
Car

Going to source some of these from free assets I find online

Player Mechanics 
Controls – WASD to move and mouse to look round
Enemy boss – if player looks at boss for too long he will die
Health Bar – Player will have 100 health if that reaches 0 player dies

Enemy mechanics 
Enemy Attack – Deals damage to players health when close enough 
Enemy Movement – Follows the player 
Enemy Boss movement – Randomly generates near the player near the player 
Enemy boss jump sequence – When player dies camera pans and zooms on boss and player dies

Combat mechanics
Flashlight – Player uses flashlight beam to kill basic enemies
Enemy- Base enemy will follow player, when close will deal damage to the player
Boss Enemy – If the player looks at the boss for too long the player will die triggering the enemy boss jump scare.

User Interface
Player health Bar – health bar updates when player has been attacked
Wave counter – updates what wave player is on
Enemy Boss warning – When entering the third round, UI will appear warning the player eg “Don’t look at him or he takes your sight”
Flashlight – If flashlight is turned off, text will appear to guide player to press “F key” to turn it back on

Sound mechanics
Footsteps – footstep sounds when the player moves
Basic Enemy- Scream sound when enemy dies 
Boss enemy-  Sounds plays when boss enemy is in sight
Wave 1 – Silent(woods sounds)
Wave 2 – Silent Screams when enemies die
Wave 3 – Intense faster pace music plays 

Goal – Kill all the enemies in each wave and survive

How will each round progress?

Wave 1 – Round one is the starting round which should get the player use killing the enemies
Wave 2 – Will make the enemies a little bit harder and will startle player when they scream
Wave 3 – This should surprise the player when the enemy boss appears and because this wave is going to be a lot harder, I made the amount of enemies to kill smaller. This however will make it more intense because it will let the player know the enemy boss is formidable 

In conclusion, I have modified my idea to something which I feel more comfortable developing and have more ideas for. I feel like the change in ideas and stronger influences of example inspirations create a more structured planned idea. Now that I have created a proposal, I am going to create a sequence diagram for game.

References 

Level UP

Augumented Reality

Introduction – In this blog post i will be explaining what is ARCore and ARfoundation, how its used and how it works.

Sections
– What is AR?
– Principles of AR?
– What is AR Foundation?
– What is ARCore?
– How does it work?
– Fundemental Concepts

What is AR?

Augmented reality uses a camera to track the world position and implement 3D models into the real world space, this can be used in a muliple of ways. Before this was accesible on an everyday phones this was used for many sports matches on television but now is used widly for advertising, shows and consoles etc.

Football real time AR
Muesum AR video
Burger king AR advert
Related image
3DS AR cards

Principles of AR?

“1)World tracking: track the device’s position and orientation in physical space.
2)Plane detection: detect horizontal and vertical surfaces.
3)Point clouds, also known as feature points.
4)Reference points: an arbitrary position and orientation that the device tracks.
5)Light estimation: estimates for average color temperature and brightness in physical space.
6)Environment probes: a means for generating a cube map to represent a particular area of the physical environment.
7)Face tracking: detect and track human faces.
8)Image tracking: detect and track 2D images.
9) Object tracking: detect 3D objects ” Source – Unity3d.com

What is ARFoundation?

Ar foundation is an API that assists the function of augmented reality developing in unity. This API has its own unity namespace and consists of multiple of subsystems that support the core fuctionality of ARCore, ARkit and future platforms.”For now, it supports features such as vertical and horizontal plane detection, light estimation, feature points, AR scaling and AR anchors.” source – https://unity3d.com/how-to/create-AR-games-in-Unity-efficiently

What is ARCore?

ARCore is googles development for building augmented reality. “Using different APIs, ARCore enables your phone to sense its environment, understand the world and interact with information. Some of the APIs are available across Android and iOS to enable shared AR experiences.

ARCore uses three key capabilities to integrate virtual content with the real world as seen through your phone’s camera:

Supported for different devices includes android and IOS in this link below:
https://developers.google.com/ar/discover/supported-devices

How does it work?

“Fundamentally, ARCore is doing two things: tracking the position of the mobile device as it moves, and building its own understanding of the real world.

ARCore’s motion tracking technology uses the phone’s camera to identify interesting points, called features, and tracks how those points move over time. With a combination of the movement of these points and readings from the phone’s inertial sensors, ARCore determines both the position and orientation of the phone as it moves through space.

In addition to identifying key points, ARCore can detect flat surfaces, like a table or the floor, and can also estimate the average lighting in the area around it. These capabilities combine to enable ARCore to build its own understanding of the world around it.

ARCore’s understanding of the real world lets you place objects, annotations, or other information in a way that integrates seamlessly with the real world. You can place a napping kitten on the corner of your coffee table, or annotate a painting with biographical information about the artist. Motion tracking means that you can move around and view these objects from any angle, and even if you turn around and leave the room, when you come back, the kitten or annotation will be right where you left it.” Source – https://developers.google.com/ar/discover

Fundemetal concepts –
1) Motion tracking
2) Environmental understanding
3) Light estimation
4) User interaction
5) Oriented points
6) Anchors and trackables
7) Augmented Images
8) Sharing

Source – https://developers.google.com/ar/discover/concepts

Thank you for reading,
James Lacey

Citation –

https://docs.unity3d.com/Packages/com.unity.xr.arfoundation@2.2/manual/index.html – Principles of AR?

https://www.fi.edu/what-is-augmented-reality

https://computer.howstuffworks.com/augmented-reality1.htm

https://developers.google.com/ar/discover

Create a free website or blog at WordPress.com.

Up ↑

Design a site like this with WordPress.com
Get started