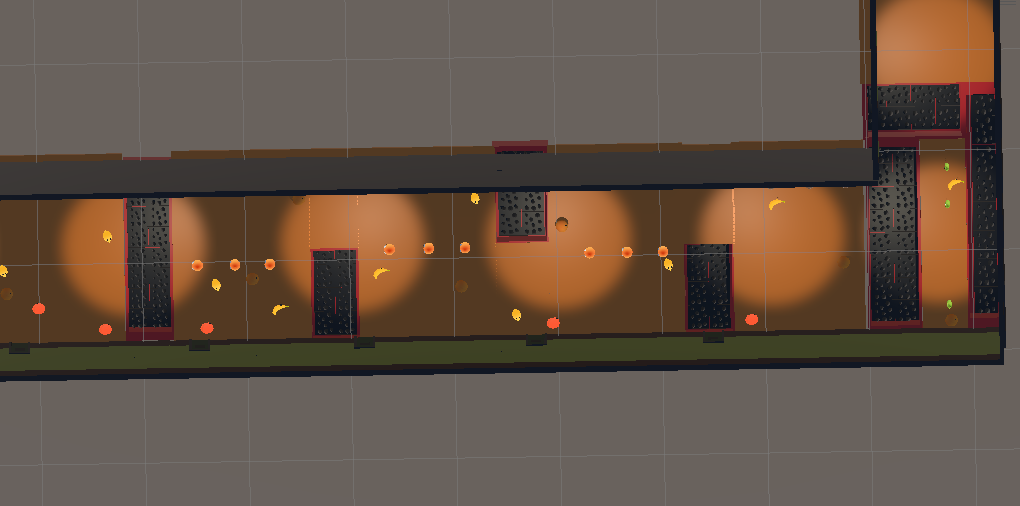
Major Project – Itch.io upload, gameplay and reflection

Introduction: In this blog post, there is a link to download my major project on Itch.io, some gameplay to evidence my project and my reflection on the overall project.

Itch.io Link:

https://shonenburst.itch.io/the-fruitable

Raw Gameplay:

Reflection

Overall Thoughts:

During the first six weeks of my project, I made good progress in keeping up with my Gantt chart. However, as the project developed, I began to fall behind schedule, resulting in the omission of some planned features, including two difficulty modes, progress-saving checkpoints, and sound design. Unfortunately, the lack of sound design and two difficulty modes detracted from the game’s overall polish. Nonetheless, the game’s high level of difficulty reinforced the link between my major project and the concept of frustration, as evidenced by one participant quitting the game halfway through the allotted playtime. While the link between the achievement system and my dissertation findings was difficult to establish due to limited playtesting with only five participants, I am generally pleased with the game’s outcome. Despite the frustration caused by the bugs and issues that arose towards the end of the project, the game’s primary functionality and purpose to frustrate the player were achieved, resulting in overall enjoyment during playtesting. Furthermore, the twist on the platformer genre was well-received, and the game’s difficulty added to its overall enjoyability, which I am satisfied with upon reflection.

Aims and goals in comparison to outcome:

Throughout my project, I followed my proposal with a few exceptions, including some modifications to the level design and exclusion of certain areas of the game, which I have documented in my development logs. The overall objective of my project was to explore the feeling of frustration and investigate why players abandon games. My main focus was to emphasize repetition and mastery of skills to increase player immersion, which could lead to players overlooking bugs and positively impact their gaming experience, resulting in either continued play or abandoning the game. The platformer permadeath system was an excellent tool to achieve this, as a single mistake would set the player back to the beginning. Upon testing, playtesters experienced significant levels of frustration while still obtaining a moderate level of enjoyment, strengthening my reasoning that my game achieved its intended goal. In my dissertation, I discussed the relationship between balanced challenge and frustration, which I explored through increasing the game’s difficulty. However, upon reflection, I feel that I made the game too challenging, as I struggled to complete it myself, despite knowing the optimal path to victory.

Although I followed my proposal throughout the project, there were some areas where I did not meet my intended aim. For instance, I failed to add more story elements that could emphasize the injustice in the differences between the fruit and the vegetables. While the story is still clear, I believe that there could have been more objects added to the levels to enhance the story-telling. This failure to meet the set requirements weakened the idea that players will continue playing if they are immersed in the story and want to uncover more. Another unachieved aim was the overall polish of the game, which includes fixing issues identified during testing, and this affected the overall satisfaction with the project. To improve, better time management and adherence to my intended agile method could have been employed to identify areas of focus and return to the intended schedule. In hindsight, I think I spent too much time getting the core mechanics working, and I should have completed that within the first two weeks to enable me to concentrate on other areas.

In general, I am satisfied with the final result and believe that the project successfully achieved its intended goals. Although there were some areas that could have been enhanced, such as adding more elements to emphasize the game’s story and improving overall polish, the project successfully frustrated the player and demonstrated why players may quit games during the testing phase.

What could be added or changed:

Upon reflection, I believe that there are numerous elements that I would have added or changed within my project. In particular, there were certain areas that I missed out on, such as sound design and the implementation of checkpoints or difficulty modes, in favor of focusing on general polish and time management throughout the course of development. To elaborate further, I had intended to incorporate sound design in order to create a more whimsical and immersive experience for players, which would have served to offset some of the darker themes within the game. Without the inclusion of sound, the game seems to be lacking a key element that could enhance the overall experience and further immerse players. The absence of difficulty modes, on the other hand, has taken away from the accessibility of the game, making it difficult for players with less experience to progress and ultimately complete the game. The addition of checkpoints would have provided players with a level of security, allowing them to try different routes in the levels without the fear of losing all progress due to the harsh permadeath penalty. The lack of additional models, meanwhile, resulted in certain levels feeling empty and devoid of life, which could have detracted from the overall experience. Finally, if I had managed my time more effectively, I could have obtained more accurate results from the playtesting phase, which would have helped to further strengthen the connection between my project and the research question outlined in my dissertation. Additionally, better time management would have afforded me the opportunity to spend more time polishing the game and addressing any lingering bugs or issues, ultimately resulting in a more polished and well-rounded final product.

Future Progress:

To further progress with the project, I would first prioritize implementing the missing elements that were originally planned, such as sound design and difficulty modes. This would enhance the overall polish of the game and make it more accessible to players with different levels of experience. I would also focus on adding more models and objects to the levels to further enhance the storytelling and the immersion of the player in the game’s world. In addition, I would spend more time playtesting the game with a larger group of participants to gather more accurate results and feedback, and then use this feedback to make necessary improvements and adjustments. Moreover, I would consider expanding the game’s scope by adding more levels and introducing new mechanics to keep the player engaged and interested. Finally, I would ensure better time management and organization throughout the project, and follow a more structured and efficient approach, such as adhering more closely to agile methodologies, to avoid falling behind schedule and to ensure a more successful outcome.

Many Thanks,
James Lacey

Major Project – Development 08

Introduction: In this blog post I will be making the function to kill the boss and the two different endings the player can receive.

Project Plan:

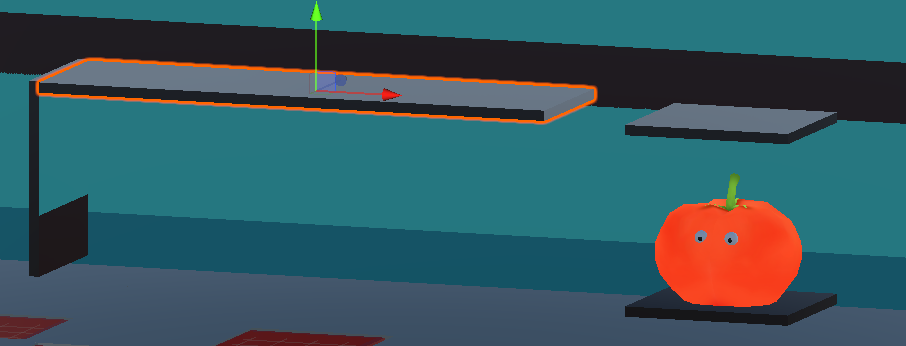
So I want the player to jump on the platform that is above the king, when that platform falls and collides with the king it will change the ending to ending 2. The two end conditions depend on whether the player kills the king or decides to spare him and go to the exit. This gives the player a choice to decide where he wants to end the story from the what they have witnessed throughout the levels.

Ending 1 = The player kills the king and murders all of the vegetables taking his place as king of the fruits

Ending 2 = The player does not kill the king and spares; creating remorse in the king and in turn harmony between the fruit and the vegetables

PlatKill:

The platkill script is attached to the platkill which is an invisible collider in the game when the player touches it it enables the rigid body gravity to true on the platform. When the collision has happened for testing purposes I debugged the function so it would print in the console that the ending has successfully changed.

Next Level 2:

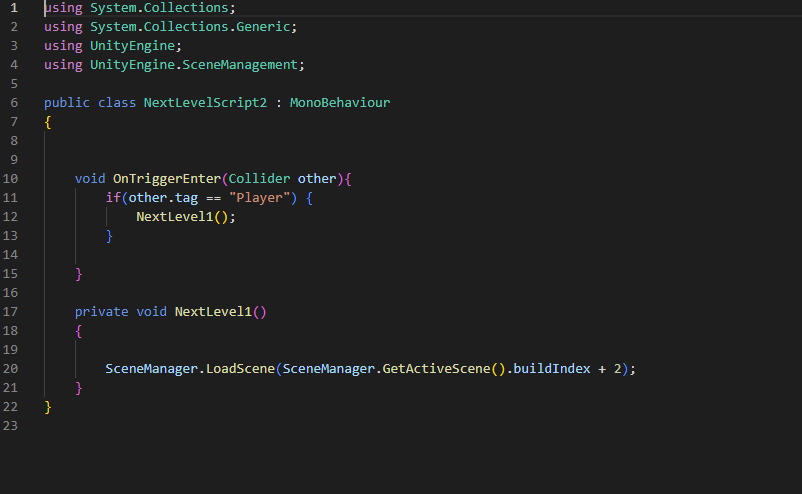
Next Level Script 2:

The next level game object is set active when the player collides with the plat kill collider. The script attached to the next level 2 simple increments the build index to the correct ending scene.

BossKill:

When the platform collides with the king, it will destroy the object and print that the king has died

Next blog post:

Didn’t manage to complete the menu in this blog post but will focus on it with the rest of the UI

  • Achievement system
  • Menu
  • Ending UI

Many Thanks,
James Lacey

Major Project – Development 05 and Level Design Second Level

Introduction: In this blog post I am going to be creating a way for the player to transition to the next scene and also starting to build the second level design.

I am going to approach making the level transition to the next scene using the scene management tool through a collision with an object.

So I created a game object and called it “next level”, attaching a script to it called “NextLevelScript”.

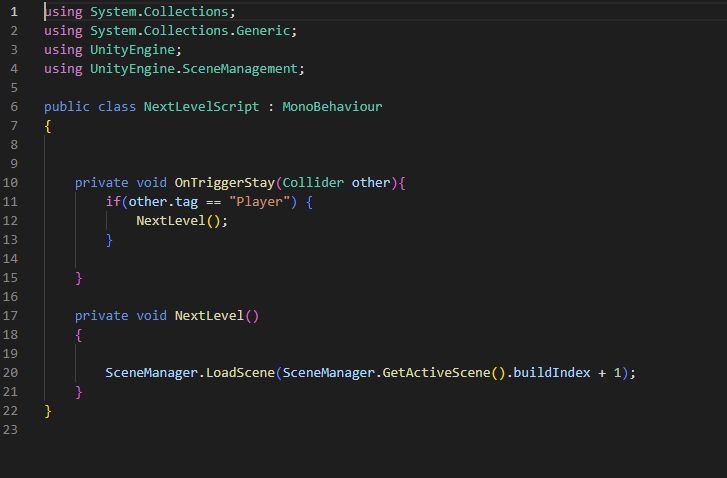
Next Level Script:

This script simply triggers when the player object collides with the next level object and runs the next level function that increments the next scene in the build index. This can be adjusted in the build settings for the order that the scenes will increment in.

Creating Level 2:

Originally I was going to have a staircase for the next level script to be attached to but I decided against that because I thought it would take up to much room in the start of the second level. The second level increases with difficulty from the first level implementing different enemies and dangers that could kill you such as the mold and flying enemies. What could be better

Made the traps bigger so the jumps were more difficult but wanted to add a path where if learnt could make this section much easier. On the right hand side of enemies, I added more room away from the mold and the flying enemies so it is easier to time a jump to get past the section.

I reused the assets from the first level and made the colours of the wall and floor blue to signify the level has changed and also its not a prison floor.

Added this group of dead fruit as a warning to what was to come later on in the climbing area of the level

creating the other pit falls

A major problem that I was the mold kill killing the player. For some reason the mold would kill the player when jumping over it and after implementing the models, the colour changer stopped working. For some reason, I could either get the models to turn green from the collision with the mold or the player dying random even if the mold kill was triggered. I wasn’t sure how to resolve and my other thought for a solution was to change the material of the models to a different green material but the same issue was still occurring. As annoying as it was I had spent too much time trying to fix this issue and needed to move on to keep up with my time table GANT chart.

The flying enemies at first I was having some difficulty with, when I was switching in the carrot model to make the carrot flying enemy prefabs. I had not added a rigid body and the models started to spin as they would go up and down through the waypoints. The simple solution to this was to change the rigid body on the model and make it kinematic so it stopped spinning. Normally this wouldn’t be possible if the movement hadn’t been controlled by code but because it is I can get away with it.

In this section of the design I decided to change the start to the climbing/wall bounce section of the game because i felt like the chase of mushrooms closing in on the player was more intense. This add abit more difficulty to the game because the player has less time to think and has to respond quickly to escape the chase getting to the climbing area.

The collection of dead fruit for the premonition shown earlier on in the level has been duplicated and put into the pits for the mass grave burials. Originally there was more duplicates of the dead fruit models but it started to become too intensive on the system and if i wanted to give the effect of more dead fruit I would have to do it in a different way. However for now I am happy with how it looks and will leave it as a stretch goal to come back to and try to fix.

The way that I had set up the wall bounce before meant that I had no problems when setting up the climbing/wall bounce area. The only issue that I had was setting up the jumps close enough to the wall but also making this area more difficult. So I decided some more daring jumps where the player has to wall bounce of the wall would add the right level of difficulty. Originally I was going to add in some enemies to make it more difficult but decided against it because when I was test playing it the enemies was killing me before I could beat the level. There was ways round this by making the enemies slower but I feel like it was not necessary as there are quite a few obsticals in this level already.

In next weeks blog post:

  • Level 3 creation
  • Level 3 Model creation (living quarter flats and safe room)

Many Thanks,
James Lacey

Major Project – Level Design Floor one

Introduction: In this blog post I will be starting the level design for the first level and mapping everything out to the level design in the project proposal.

Wall

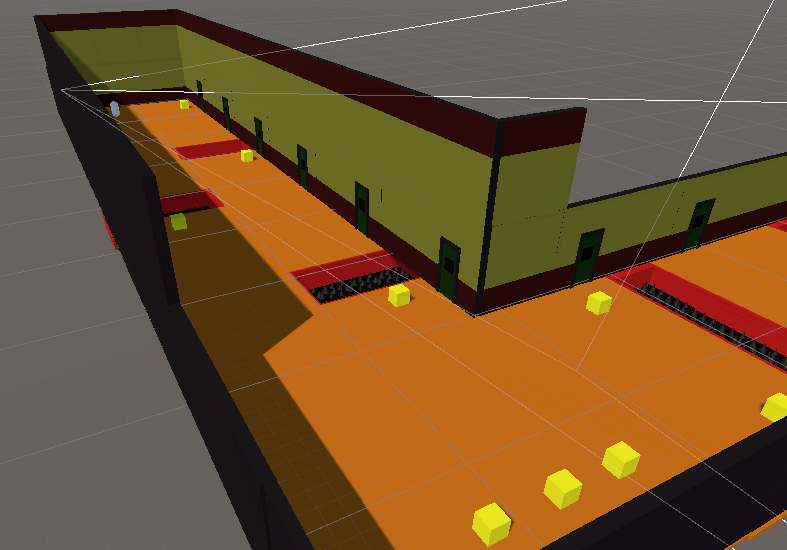
I created a new scene and made the objects from the sample scene into prefabs. I then added all the objects into the scene the way that it was planned in the project proposal.

Spike Trap:

Box = red

Spikes = Black

Now that I have created the first section, I am quickly going to make my character models. I am using an asset off the unity store for all the vegetables and fruit models and then I am going to add some spheres for the eyes to bring them to life. Now I can start to litter the hall ways with dead bodies and add models to the enemies.

Added bouncy material to the collider so when the enemy runs over it, the dead body will move and start to bounce round the map. I added this in because i thought that it would make the game a bit whimsical and take away from my first worry that the game would have too many dark themes in.

In the next blog post:
– Add in a way to get to the next level
– Start to implement and create the second level

Group Project – Development_04

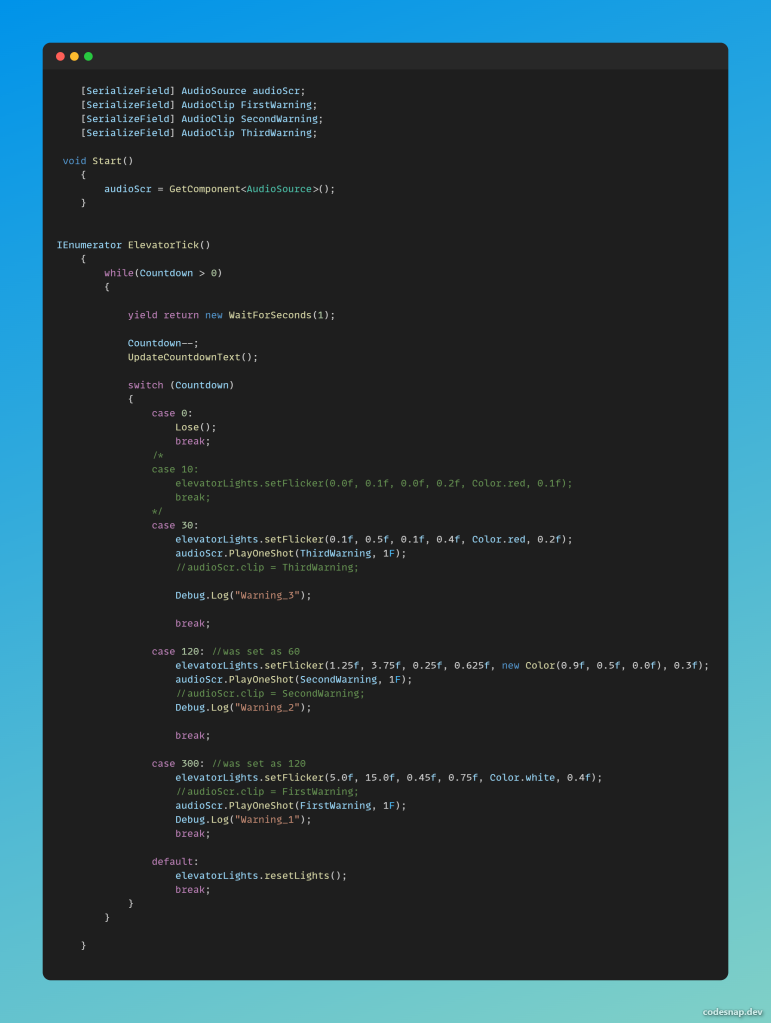
Introduction: In this blog post I will be adding in sound effects and sound to the game and then doing some testing to see if the game works properly

Last weeks objectives:
– Sound/ Sound Effects added (Lobby music, Metal clanging noises applied to countdown timer)

Aims and Objectives
– Add in lobby music
– Add sound effects
> Correct Keypad answer
> Incorrect Keypad answer noise
> Button Press noise (Keypad)
> Metal clang noise (timer countdown)

LobbyMusic-

This will play music on loop as the player is in the main menu and I sourced this music and sound effects from OpenGameArt and BBC sounds.

Correct KeyPad answer:

Metal Clang Noise sound effects:

Testing:

There was some issues with some of the members getting into college/university so we could test the headset so I needed to set the headset up on my computer so we could play test it. When me and caleb started testing, some of the buttons would disappear when you clicked them two or three times which was a small issue. The main issue was some of the questions that caleb had created was not correct so the player couldn’t reach the end of the game. However, after some fixing we managed to play the game together using the companion app to solve the maths puzzles and set a score on the leaderboard

EEVR Full Demo Video – YouTube *Link to video of Game Demo*

Whats next?
-Write up the reflection and hand the assignment in

Many Thanks,
James Lacey
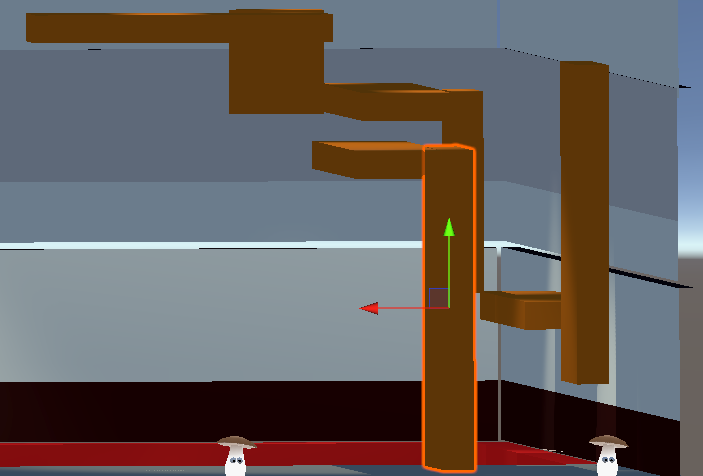
Group Project – Development_03

Introduction: In this blog post I will be

Last Weeks: Objectives

  • Focus on my serializable leaderboard interaction method
  • Create a canvas and a Json bin to update rank, name and score

Aim & Objectives
– Get a working leaderboard that can update scores from when the player completes the game

Tutorial:

https://www.youtube.com/results?search_query=leaderboard+unity+5+mins

In the tutorial he is setting up the canvas to have a vertical layout of score that update for rank, name and score using a HighScore manager and a script attached to the rows(vertical layout). For game I needed the canvas to be in the world space so the player can see it in the main menu lobby.

Now that I have that set up, I can create a JSON bin with some demo scores and start making the scripts to access the cloud using JSON. The tutorial breaks down some scripts like a scoremanager, scoredata, score UI, Row Ui and score.

RowUI:

Starting with Row UI, this is a script is simply to use the text as a reference so I can update the scores saved into the Json to the correct row.

Score:

Created a serializable class for score to save for the name and score

ScoreData:

This script add the new scores to a list that will then be accessed by the score manager later

ScoreManager:

ScoreManager controls all of the Json serialization and gets the data from the Json bin and the score data list and then uploads the json to the cloud. It identify the could and serialise through the Json bin URL and

Jsonbin:

This is the data bin where I saved the demo scores

This accesses the score manager, converts the high score into an array and uses a for each loop to instantiate the rank, score and name onto the canvas in the scene.

Why did I do it this way?

In all honesty, I was a bit confused when approaching the Serialisation and few different ways can be used to serialise and update the data. Some that I come across was DreamLO and using Json Utility from the

What was the outcome?
– Managed to create a leaderboard system that updates the player score
– Created world space canvas which appears in the main menu
Caleb is going to look into the

Challanges and obsticals:
– Trying to understand serialisation and getting the scores to update and download from Json bin
– Getting the UI text to update in the scene (didn’t realise I needed to change the scores saved in the list to an array so I could instantiate them onto the canvas in the scene)

Whats Next?
– Sound/ Sound Effects added (Lobby music, Metal clanging noises applied to countdown timer)

Many Thanks,

James Lacey

Group Project – Development 02

Introduction:

In this blog post of the group project, I started to focus on the Floor Level Keypad. I used the tutorial link below to under how to implement working buttons without using the Oculus Interaction Toolkit SDK example interactions provided.

Last Weeks: Objectives

  • Create the Key Pad so its interactable and then we can start to implement the questions into the scene
  • Will use a keypad tutorial

Tutorial:

So I copied what he has done in the tutorial and simplified it because the floor level only needs numbers and not letters. I haven’t added the buttons over the model of the Floor Level Keypad Control yet but will add this later in the blog post. So far what I have though is the buttons work and as the project progresses, will implement the codes for the problems in the game to be solved.

Floor Level Keypad Control:

Scripts

Keyboard

This script adds the characters to string and the delete char subtracts from the string displayed on the TMPro input field.

Keyboardbutton

This script uses the parent keyboard then uses the characters (numbers in this case) to add the game object button text of the keyboard character using the keyboard parent

Typing Area

If the OVRgrabber of the player controller is in the typing collider then it will set the hand as active so the hand can interact with the buttons and press them.

I decided that it would be better to use the keyboard tutorial rather than using the oculus button assets to make the keypad, this way the keyboard code can be reused for inputting a name for the leaderboard which Caleb agreed he will implement for the main menu. Was only going to create the keypad but having a keyboard to input the name in the main menu for the leaderboard score makes for a more competitive game. The competitive aspect could potentially make the game more enjoyable and engage the students more in learning maths if they are pitted against each other in teams.

The keyboard does not work functionally yet in the scene

Implementation on Keypad:

When implementing this into the scene, ross changed a bunch of the logic of the code to fit better with setting up the question and answer system. We both had a little bit of miscommunication at first because when I sent the code, ross didn’t understand how the scripts worked so that’s why he changed the code. However, we both sat down later and explained that the Typing area is a box collider so when the hands of the player enter the collider it can then use the keypad. We applied the fixes needed to get it functioning by adding a collider to the index finger. After fixing the functionality of the keypad we then added in some logic for the gamescript to give correct and incorrect for caleb to expand upon later with the question and answer system.

What was the outcome?
-Functional Keypad to answer the questions that caleb will add in later
-Created the tutorial keyboard and applied that into the game with ross

Whats next?
-Focus on my serializable leaderboard interaction method
-Create a canvas and a Json bin to update rank, name and score

Many Thanks,
James Lacey

Major Project – Development 02

Introduction: In this blog post I will start implementing the core mechanics that will make up the player and enemy interactions, this will include the player movement, player wall bouncing, enemy movement and enemy attack. These functions are key to the base mechanics of the game; can the player complete obstacles in the levels and can the enemy detect the player and kill.

The first step was to create the player movement which I used from one of my previous projects in the second year from my zombie survival games. However I did modify this

Script

Player Movement –

Player Movement

The player movement is controlled by the default controls for unity, using WASD to move round in the scene and then the mouse to look round using another script attached to the player and main camera (“Look X” + “Look Y”). Using the unity input i got the axis of “horizontal” and “vertical” to control the camera (this was taken from my zombie shooter game). However I changed the original script to use direction to update the player when moving forward through length measurement using magnitude, it takes the coordinates of the x and y from the players input and then calculates the target angle from the way they would be moving. Takes the rotation of the quaternion and converts the target angle through a eluer to convert the angle when the player moves.

A have a few issues with it, when the player moves forward there is a slight drift to the right or left but I am not too sure how to fix it, however it does work it is just not as slick as I would like. This can be a later fix when I have completed every thing else, its just a minor perfection I would like to make.

Jump

Then implemented a jump function which checks the player is grounded using an if statement and then applies jump speed, the jump is equal to gravity multiplied by time dot delta time. The else statement simply is just the walking function.

I noticed that the movement of the player is not very fluid and has some input issue where the player moves diagonal when the player presses forward. This is an issue that needs to be fixed so the core mechanics work.

Wall bounce

The wall bounce mechanic from the tutorial that I was following was suppose to send the player in the opposite direction, it works but does not work as intended. This is not a massive issue but I am going to try resolve this by following the tutorial earlier to try fix it. However the raycast is being recognised when the player touches the wall to bounce of it. However the player can then just keep bouncing off the same wall to scale an obstacle which does affect the effectiveness of the mechanic. I am going to follow the tutorial again and see where my code differs in an attempt to get it to work as intended, its not a major issue but I feel like this affects the gameplay.

New Player Movement (script)-

So I changed what I did with the getAxis to GetAxisRaw because smoothing is applied to getAxis. This smooths the direction over time where as the GetAxisRaw does not apply the smoothing and inputs it automatically without smoothing over time (time.deltatime) by directly using the magnitude that has been applied in the script. This seemed to fix some of the issues that I was having with the movement going diagonal slightly after inputting a direction.

Instead of trying to use direction and prevDirection to get the last move equal to the current move I followed his script and made a vertical velocity that uses the jump force instead of jump speed to multiply the vertical velocity for the wall bounce to happen when the raycast detects the wall. Trying to kit bash one of my older movement scripts to the tutorial was what was causing the function to not perform correctly so after using his way of using move Vector and breaking down the jump force, gravity, vertical velocity, speed and last move made it much simpler to get the function work. So it was mainly two lines of code which was placed wrongly and was making the wall bounce not register properly, now that it has been reformed the code seems to work properly for the intended purpose. Also the raycast now is only being detected once now when the player wall bounces instead of multiple raycasts hitting the wall like before.

Reformed Movement and Wall bounce:

(14) Creating a Third Person Camera using Cinemachine Free Look in Unity that Avoids Obstacles (Tutorial) – YouTube

Cinemachine added instead
reasons:

  • Reduces the clipping from the camera from going outside the walls
  • Ease of use and simplicity
  • Smooth a fluid rotation of the camera
  • Very customisable

Focus on the next blog post:
– Setting up two types of enemies that will be in the game (1 ground enemy and 1 flying enemy)

Many Thanks,

James Lacey

Leap Motion example project

Aim: build a game where the player can use the leap motion hand tracking to hit some blocks of a platform

What is leap motion?

“The leap motion controller is an interactive tool used for gesture recognition and movement in various fields like medicine, manufacturing, 3D modeling etc. It uses cameras and infrared LEDs to track the movement of the hand.
https://www.sciencedirect.com/science/article/pii/S1877050918307403

No tutorial was needed because the unity package for ultraleap was a package that comes with a bunch of predefined objects and scripts to utilise the hand tracking.

https://docs.ultraleap.com/unity-api/The-Basics/getting-started.html

Objects in the game:
– ContactCounter
The main script used in the example “Playerscript” is used to process the cube tag on the cube to increment the score
– Cube
Tag attached to the cube object named “cube” which is utilised to tell unity that this object is the object to process when it hits the contact counter. The cubes implemented were part of the Ultraleap package
– Hands
Some Preset hands that are in the ultra leap asset package to show where the players hands as they are tracked
– UI
The UI has two things in it, a counter for the player to know how many cubes that have been scored when they are knocked off

Player script

The player script has some simple functions in it, it communicates with the count text in the game so when a cube contacts the contact counter object it will increment a score of 1 and when it reaches 6 is will display some UI text telling the player that it has won. After the cube touches the counter, the collision of the cube to the counter is processed and destroys the cube.

Example of the game working:

Many Thanks,

James Lacey

Machine Learning based AI systems

Aims: The aim in this blog post is too create a machine learning AI robot using a tutorial using unitys MLagents assets. Have the agent in the scene move and navigate to a bot with a reward and

Asset pack used: ML agents 3.0

The version of unity used: 2020..3.17f1

Tutorial link: https://www.youtube.com/watch?v=zPFU30tbyKs&t=2136s

What is Machine learning based AI systems?

“Machine learning is a branch of artificial intelligence (AI) and computer science which focuses on the use of data and algorithms to imitate the way that humans learn, gradually improving its accuracy.” – https://www.ibm.com/topics/machine-learning

Machine learning cycle:
– Observation
– Decision
– Action
– Reward

Steps taken:

The first thing to implement was downloading the MLagents github files from the tutorial and install a version of python 3.8 and onwards. Then optimising the python so it will work with the mlagents package activating it on the computer. After this he added something called pytorch which is an open source library to demonstrate the interpretation of the data, in this example it is interpret the moves and steps of the Agent AI reaching the goal.

After creating a goal in the scene, a wall and a agent we can start on some of the scripting. In the tutorial he gives it a simple name called move to goal AI. Nice and easy to understand its purpose.

The logic involved in this is using the behaviour parameters that appears moving onto the script when the player

After this its the step of creating the unity project and adding the unity package asset mlagents into the project.

Before moving onto the rest of the input of the logic into the project, the defined goal is to get the agent to move towards the goal and not run into walls finding the most optimised pattern. The goal needs to be clear and possible for the AI to achieve otherwise it becomes redundant.

inside the move to agent goal script we are going to use the predefined behaviour parameters to move to the goal uses the x and y axis towards the goal. The important thing to know about this package is that the AI can only be fed numerical values such as whole numbers and floats. So this script feeds information on the observations made by each episode if it hits the goal or wall giving it a numerical reward of plus or minus one and the reiteration of the process so the AI can start to make a decision on the best route to the goal. Once it starts to understand the action to make to to get to the reward it will start to calculate the best pattern. The goal and punishment of the wall uses colliders to understand when the player has hit the wall. Creating an empty script attached to the goal and wall are used as place markers for the code in the move agent script to identify the goal/wall.

The next step is to take the example made and duplicate it more so we can see multiple ways the AI will react and how long it takes to reach the most optimal pattern. Think of the agent as a brain and we are feeding that brain how to optimally teach reinforced learning.

Installing python and creating a virtual environment

python command prompt

MLagents-

This is an AI training tool which can set the AI in the game to use machine learning to figure out the best pattern to a specific goal. In the tutorial, it is teaching the AI to find the goal and to not touch the walls with a reward system. If the AI touches the wall it will lose a point and if it reaches the goal it will gain a point and redo it all over again. As the AI navigates its way to the goal, the reward system teaches the AI the best and quickest reward system. Ran through python uses test cases to see how long or how many attempts its taking the AI to reach the best pattern of movement towards the goal.

Scripts;

MoveToGoalAgent

Walls

Goal

Single learning AI:

Full learning AI build:

Here it shows that all of the agents have learnt to get to the build in the most optimal way but also exhibits how the agents are not very creative and all eventually come to the same conclusion.

Limitations when using machine learning AI

I created and worked on the project and come back to it but it had issues the python would not work so I had to set up another virtual environment to test the AI MLagents in the game scene.

The version of python and mlagents can have issues setting up with new framworks and newer iterations of the nvidia cuda tools.

When working with the AImachine learning, if the goal is more complex too reach then it will take a considerable amount of time for the AI to learn the pattern of what to do. In this sense, using machine learning in a game for your AI there is the potential that the computer will become so advanced with the patterns if this was in a shooting game, then it would become to smart for the player and after every death will only get smarter on how to kill the player.

How could this used in future?

Where this could be really useful for a game is difficulty settings. Different run cases could be used for levels of difficulties

http://www.youtube.com. (n.d.). How to use Machine Learning AI in Unity! (ML-Agents). [online] Available at: https://www.youtube.com/watch?v=zPFU30tbyKs.

Blog at WordPress.com.

Up ↑

Design a site like this with WordPress.com
Get started